How to Create Natural Light Indoors
-

Content Creator & Photographer
- December 23, 2024
- 10 min read
- Photography

Photoshoot locations on Peerspace typically cost $60 — $220 per hour.
See unique photoshoot locationsWondering how to create natural light indoors? At Peerspace we understand; after all, photographers need every tool at their disposal to flourish. Natural light photography is the art of using available light instead of flash units to expose your scene or subject. While both styles have their pros and cons, natural light is a bit trickier because it’s difficult to control. Plus, there may not be as much light as you like where you want it to be.
However, you can actually capture the ambient environment beautifully with just a bit of knowledge and practice — and without having to cart around additional electronic gear. This is particularly handy in rooms where you’re paying for the space (or you’re simply looking to limit the size of your kit). Without further ado, let’s take a look at how to create natural light indoors.
- How to handle mixed lighting situations
- Getting the exposure right via the exposure triangle
- Working with windows to get perfect natural lighting
- How to create the right effects using reflectors and catch lights
- Where to practice your natural light indoor photography
How to handle mixed lighting situations

Anyone who has operated a camera knows that it’s easy to get an unattractive yellow color in their photographs without white balancing for incandescent lighting. But what if you’re working with mixed lighting (incandescent/fluorescent in combination with natural lighting)?
Using natural light as your only light source
If you’re working solely with natural light, then turn off interior lights that aren’t close to the color temperature of the available light. Measured in Kelvin units, natural daylight is at around 5000-6500K.
The warmer light of interior incandescent lights sits below that, around 2000-3000K, and household incandescent lights around 3400K, depending on the brand and color cast.
White balancing act
Given how relatively close and bright interior lighting can be in contrast to natural lighting, white balancing a scene can be difficult. This is especially true if you have competing color temperatures and your subjects shift closer to a given light source.
Skin and clothing tones can vary wildly as your subject moves across the room. And so can your exposure values.
This is less of an issue if you’re working with a model taking direction. It becomes much more of a challenge if you’re shooting an event.
Perhaps you can’t manipulate your aperture, ISO, or shutter speed enough to compensate with all interior lighting. Or maybe you can’t off or turn off the lights and then keep shooting. If so, you can fix the white balance issues in post-processing.
Working on your own studio? Then check out our guide on setting up a photography studio for all the information you need!
Getting the exposure right via the exposure triangle

You can get the right exposure by controlling the aperture setting of the lens. This allows you to maximize the amount of natural light available for proper exposure and create natural light indoors.
Aperture values
Aperture, expressed as an f/number is the size of the hole that allows light to strike the sensor. The aperture function is inverse to the size of the hole; the smaller the f/number the larger the hole becomes. But be aware that aperture is lens dependent; lenses with wider maximum apertures tend to be more expensive than narrower ones.
Using aperture values wider than f/2.8 will ensure you can work in most natural light settings. The f/2 and below lenses are best for ensuring good exposure in most lighting situations. Aperture values are a bit deceptive; f/2 is actually twice the amount of light collected compared to f/2.8 and f/1.4 twice that of f/2. So go as low as possible with natural light.
Wider apertures also create a shallower depth of field. Depth of field is how much of a scene is in sharp focus. It is essential to the classic portrait look. Depth of field is also a function of the focal length of the lens; f/4 on a 16mm wide angle lens will have an entirely different look from f/4 on a 135mm telephoto lens.
ISO and shutter speed
ISO and shutter speed, the two other components of the exposure triangle, are just as important as aperture control. Shutter speed controls how quickly the shutter mechanism allows light to strike your sensor/film. Conversely, ISO measures how sensitive your (digital) film is to the light.
Increasing your ISO value along with your aperture are the first two things you’ll want to do since you’re usually working with moving subjects with natural light portraits and need to freeze the action via shutter speed. How sensitive an ISO value you use depends on your camera and aperture. It will take some pre-shoot test images to determine the correct setting for each shoot.
Get more tips and tricks when you check out our guide on how to shoot portraits with a black background.

Working with windows to get perfect natural lighting

Windows are our most obvious source of natural lighting. And having our subject close to the source maximizes the amount of exposure for photographs. Ideally, we want our subject front lit by the window, with the photographer positioned in between the subject and window.
Diffusing natural light
If the lighting is direct and creates harsh shadows over the face of your subject, consider closing the curtains or bringing your own white curtain or sheet. Curtains will diffuse the incoming natural light, scattering it so that it’s less harsh and more flattering to the skin for portraiture.
The more somber lighting also creates a pleasing ambiance.
Backlighting
Backlighting from the windows can also work so long as you meter for your subject instead of the windows. This does mean that the highlights coming from the windows will be blown out.
However, if your sensor or camera settings have enough dynamic range to compensate and you’re shooting in RAW, you may be able to recover your highlights in post-processing. Alternatively, you can expose for the windows to capture a striking silhouette of your subject instead.
How to create the right effects using reflectors and catch lights

Reflectors are another great tool for creating natural light indoors. If your subject is facing in a way that’s pleasing but underexposed, a reflector can bounce back light from the window to give just enough fill lighting to create the image you want.
Using reflectors and working near a window also helps create catch lights in the eyes of your subject. The spark of luminescence in the eyes of your subject is key to creating a magnetic portrait full of life.
Keep in mind: you’ll need an assistant when working with a reflector to create optimal exposure or catch lights. The position of the catch lights is also something to consider, with 10 o’clock to 2 o’clock being traditional. Note that the light positions will shift relative to the position of your model to the reflector, window, or other natural light sources.
Closing thoughts
Natural light is sometimes derided as “lazy photography” for photographers who can’t learn to properly utilize a flash unit. There’s some truth to that, but just as much to say that many photographers are unable to work with available lighting in creative ways and unwilling to learn.
The exposure triangle is foundational to working with natural light, particularly aperture in human portraits. Of all the tips listed here, the exposure triangle is the one most limited by the gear you bring; all of the others require little to no investment in additional money.
Understanding how color temperature works will assist in ensuring your white balance isn’t thrown off in mixed lighting situations. And positioning your subject properly at a window while directing natural light with reflectors and diffuser tools gives you nearly as much control over your lighting as flash photography offers.
Check out these inside photoshoot ideas that’ll pop on the ‘gram for inspiration!
Where to practice your natural light indoor photography
Now that you know how to create natural light indoors, you’re no doubt itching to put your new skills to practice. Luckily, that’s something else Peerspace can help you with, too!
As the largest online marketplace for hourly venue rentals, we make it easy to locate and book spaces that allow you to create incredible content. From fully equipped photo studios to private homes where owners invite you to use their spaces for your creative projects, Peerspace can connect you to tons of unique spaces in your city.
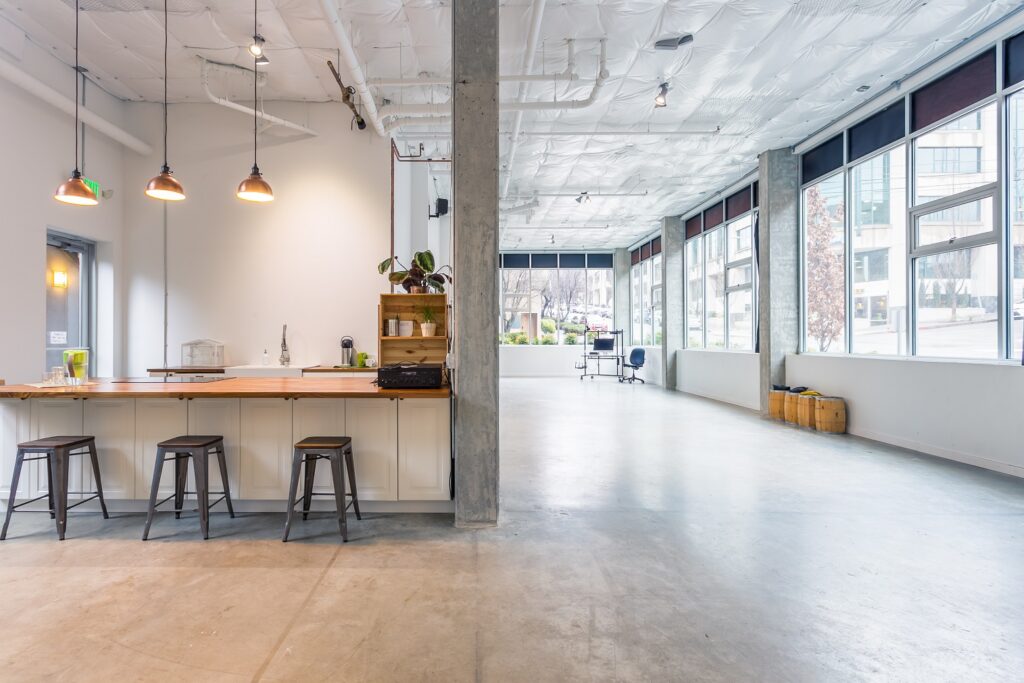
Here are a few of our favorite indoor natural light spaces for reference:
- This pristine photo studio in Seattle, WA (pictured above) with huge windows wrapping along three walls for plenty of natural light exposure.
- This beautiful natural light photo studio space in St. Paul, MN with high ceilings, pale exposed brick walls, huge windows, and multiple backdrops.
- This bright and modern home in Chicago, IL with a gourmet kitchen and other shootable spaces ideal for lifestyle content.
- This natural light photo studio in Los Angeles, CA with floor-to-ceiling windows, backdrops, a cyc wall, and plenty of props to enhance your shoot.
- This open plan converted warehouse photo studio in London, UK with an exposed brick wall, lighting gear, props, and amenities.
- This natural light photo studio in Waltham, MA that’s all white with blackout blinds, backdrops, a kitchen, and equipment.
- This chic cafe near Piedmont Park in Atlanta, GA that features wrap-around windows that let in lots of light, unique lighting, and a variety of seating areas.
And though that’s only the beginning, you get the picture! There are plenty of professional natural light indoor studios and other creative spaces at your disposal via Peerspace. And since every Peerspace is owned by a dedicated host, you can rely on yours if you need help discussing the venue’s lighting options before and after booking. Check out what’s available near you and get to shooting!
How to create natural light indoors: conclusion

Knowing how to create natural light indoors means you’ll capture stellar portraits, product shoots, and other commercial content no matter the ambient lighting situation. Keep these tips and tricks in mind as you work on your indoor photography. Before you know it, your work will reflect your dedication and experience.
And remember, booking an indoor photo studio through Peerspace is the easiest (and most fun!) way to work in a professional setting. Check us out to see what types of spaces we have available near you today!
Find production locations on Peerspace
Get together somewhere better
Book thousands of unique spaces directly from local hosts.
Explore SpacesShare your space and start earning
Join thousands of hosts renting their space for meetings, events, and photo shoots.
List Your Space